How to Upgrade Your Laptop to an SSD: The Ultimate Speed Boost
Still using an old spinning hard drive? Discover why upgrading to a Solid State Drive is the single best investment you can make for an aging PC.
If you've read our guide on Fixing a Slow Computer, you already know that software tweaks can only do so much. If you are dealing with a laptop that takes five minutes just to boot to the desktop, or freezes every time you open Google Chrome, you are likely suffering from a severe hardware bottleneck: the dreaded traditional Hard Disk Drive (HDD).
Swapping out your mechanical HDD for a Solid State Drive (SSD) is the closest thing to magic in the tech world. It can make a cheap, six-year-old laptop feel faster and more responsive than a brand-new computer with a standard hard drive. In this guide, we'll explain the technology, help you pick the right drive, and guide you through the upgrade process.
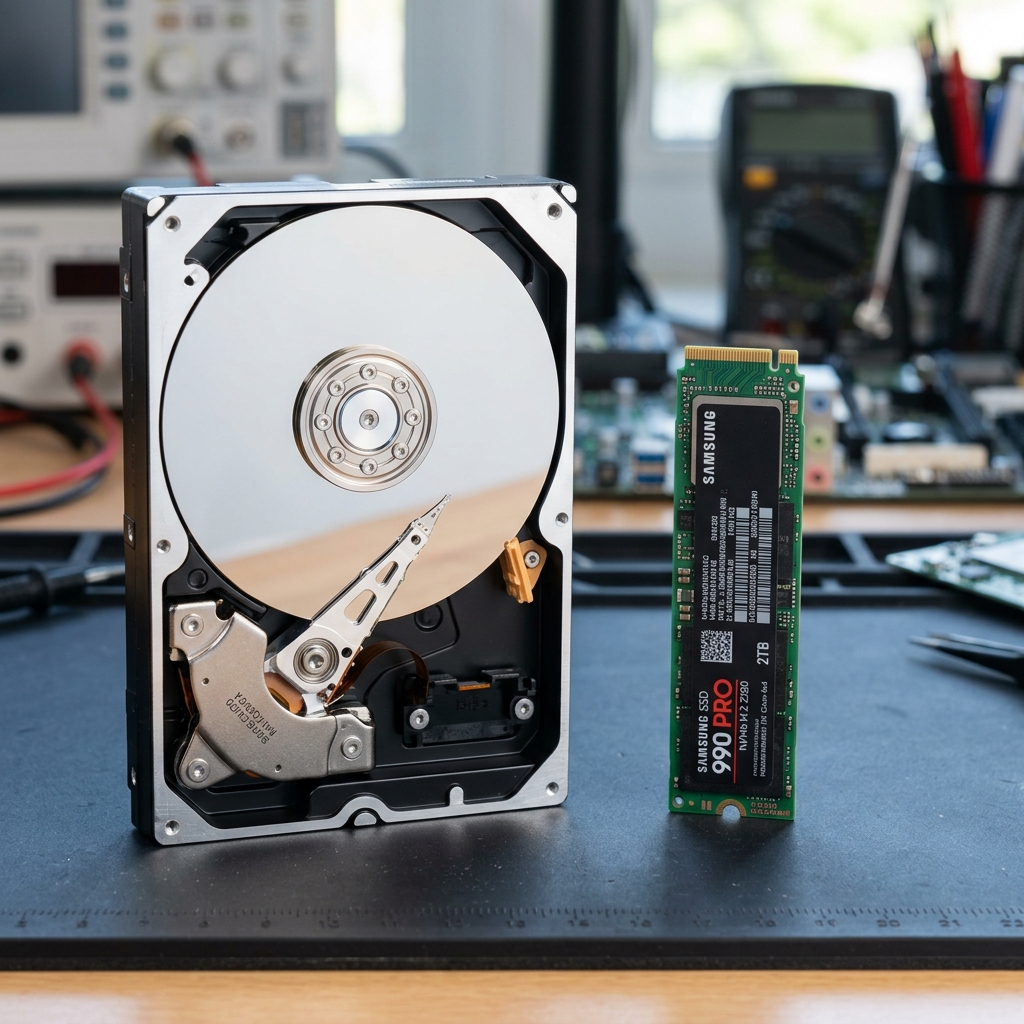
A 2.5-inch SATA SSD is an exact physical replacement for an older mechanical HDD.
Why is an SSD so much faster than an HDD?
A traditional Hard Disk Drive (HDD) is essentially a miniature record player. Inside the metal casing are magnetic platters that spin at 5,400 RPM, and a mechanical arm with a tiny needle that physically moves across the disk to read your data. Because physical movement takes time, HDDs suffer from high "seek times" (latency).
A Solid State Drive (SSD) has absolutely zero moving parts. It uses NAND flash memory chips (similar to what is inside your smartphone or a USB thumb drive) to store data electrically. Because the processor doesn't have to wait for a mechanical arm to move, an SSD can locate and open your files almost instantaneously. While a good HDD can read data at 100 Megabytes per second, a basic SATA SSD can read at 500 Megabytes per second, and newer NVMe M.2 SSDs can read at a blistering 7,000 Megabytes per second!
Step-by-Step SSD Upgrade Guide
Upgrading your storage might sound intimidating, but it is actually one of the easiest hardware modifications you can perform. Here is how to do it safely.
You need to know what kind of drive your laptop accepts. Older laptops (pre-2017) almost exclusively use 2.5-inch SATA drives. Modern thin-and-light laptops use tiny, gum-stick-sized drives called M.2 NVMe SSDs. Check your laptop manufacturer's manual or use a tool like Crucial's System Scanner to find out what fits.
You have two options for your data:
1. Cloning: Buy a SATA-to-USB cable, plug the new SSD into your laptop via USB, and use free software like Macrium Reflect to make an exact 1:1 copy of your current hard drive onto the SSD.
2. Clean Install: Back up your important photos and documents to a cloud drive or USB stick. Install the blank SSD, and use a Windows USB Installation Media tool to install a totally fresh, bloatware-free version of Windows. (Highly recommended for maximum performance!)
Shut down the laptop, unplug the charger, and if possible, remove the battery. Unscrew the bottom panel of the laptop. Locate the hard drive bay. Unscrew the bracket holding the old HDD, carefully slide it out of the SATA connector, and slide the new 2.5-inch SSD in its place. Screw everything back together.
Once Windows is booted on your new SSD, you must ensure TRIM is enabled. TRIM tells the SSD to wipe deleted files internally, keeping the drive fast over its lifespan. Open Command Prompt as Administrator and type:
fsutil behavior query DisableDeleteNotify. If it returns a "0", TRIM is enabled and working perfectly.
Frequently Asked Questions About SSD Upgrades
Q: Should I get an NVMe SSD or a SATA SSD?
NVMe SSDs in M.2 slots reach 3,000 to 7,000 MB per second read speeds and are ideal for OS drives, gaming rigs, and workstations. SATA SSDs reach 500-560 MB per second — still 10x faster than a mechanical HDD and excellent for older laptops without an M.2 slot. For everyday tasks like browsing and Office, SATA SSD performance feels indistinguishable from NVMe. NVMe shines during large file transfers, video editing, and game loading.
Q: How do I clone my HDD to an SSD without reinstalling Windows?
Use Macrium Reflect Free or Clonezilla. Connect the new SSD via USB using an M.2 or SATA to USB enclosure, clone the source drive, then swap the drives physically. Macrium Reflect handles partition resizing automatically. After swapping, run chkdsk /f in an elevated Command Prompt and update storage drivers to ensure TRIM is enabled for optimal SSD longevity.
Q: How much SSD storage do I actually need?
256GB is tight — Windows 11 alone uses 25GB, leaving little room for apps and files. 512GB suits most users: OS, 20-30 apps, documents, and moderate media files. 1TB is recommended for gamers (modern games are 50-100GB each) and content creators. SSDs perform best when kept under 80% capacity — always leave at least 20% free space for garbage collection and wear levelling.
Q: Will an SSD upgrade void my laptop warranty?
In most regions, no. Consumer protection laws in the USA, India, and EU protect your right to upgrade RAM and storage without voiding the warranty. However, some manufacturers use non-user-serviceable designs. Check your model's official service manual before opening the laptop. If a Warranty Void sticker covers a screw, photograph it before proceeding and research your regional consumer rights.
Q: My new SSD is slower than advertised — is it defective?
Advertised speeds are sequential peak benchmarks under ideal conditions. Real-world speeds vary based on file size, controller temperature, and host bus interface limits. Run CrystalDiskMark with default settings and compare sequential read and write speeds to the spec sheet. If below 80% of rated speed and temperatures are under 70C, verify in Device Manager that the drive is running on the correct NVMe interface and not downgraded to SATA mode.
🔧 When to Seek Professional Help
- Your laptop has soldered storage (common in Ultrabooks) — no user-replaceable SSD slot exists
- The clone process fails repeatedly — the source HDD may have bad sectors requiring specialist tools
- Windows will not boot after the SSD swap — incorrect partition alignment or missing boot files
- You are uncomfortable opening the chassis — one stripped screw can cause significant damage and extra repair cost